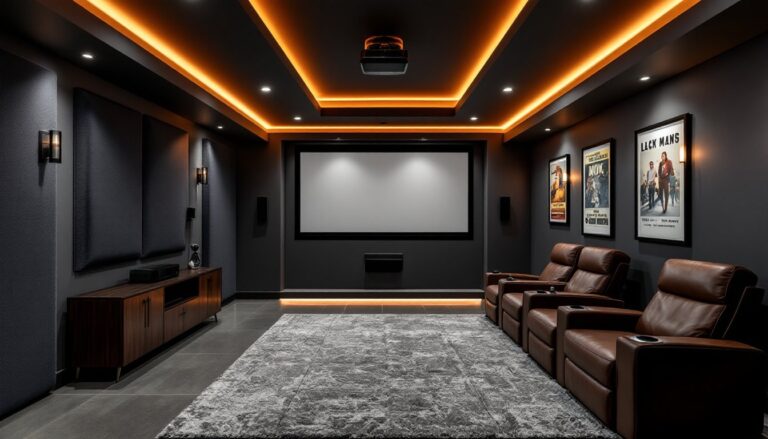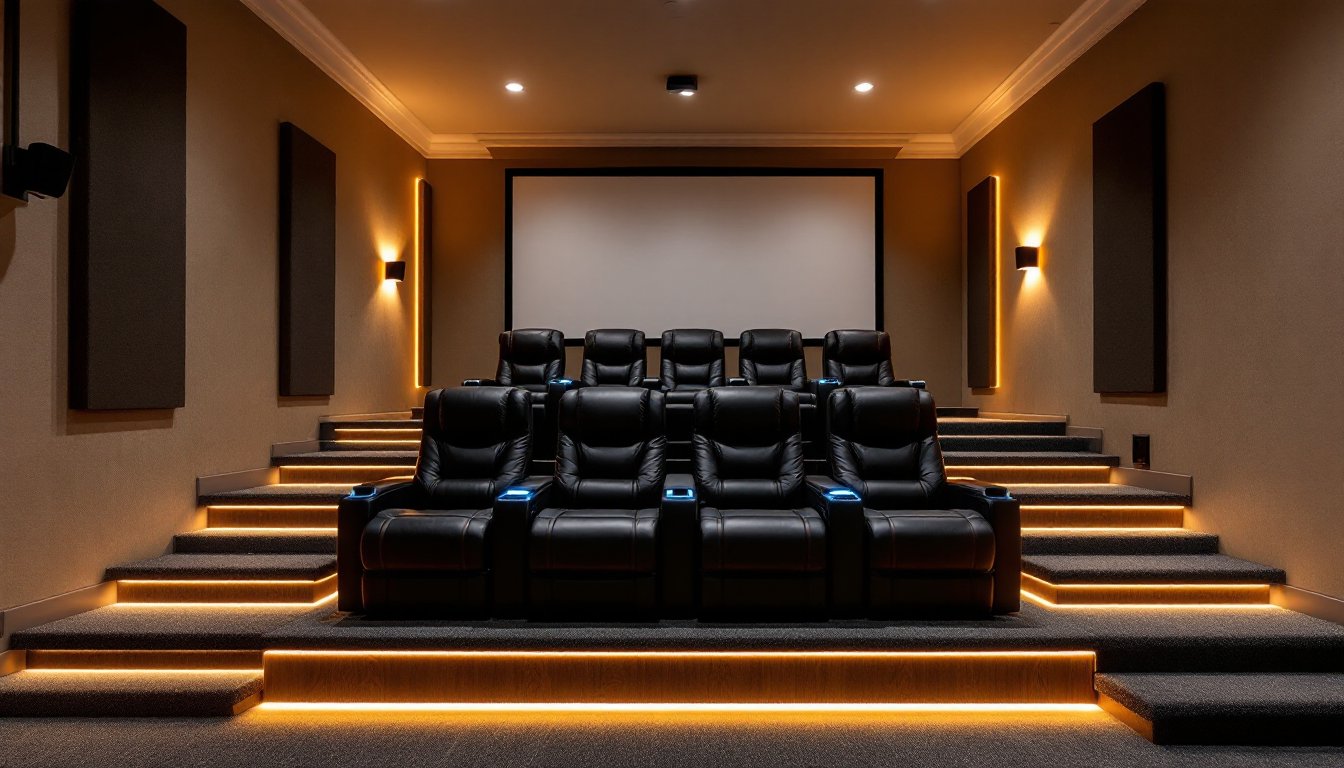
Getting the seating right in a home theater isn’t just about comfort, it’s the single decision that determines whether the room feels like a commercial cinema or a cluttered living room with a big screen. The wrong choice ruins sightlines, throws off audio imaging, and wastes expensive AV gear. The right seating transforms a spare bedroom or basement into a legitimate entertainment space that family and friends actually want to use. This guide walks through the types, layouts, features, and budget strategies that make home theater seating work, whether building from scratch or retrofitting an existing room.
Table of Contents
ToggleKey Takeaways
- Home theater room seating choice determines sightlines, audio imaging, and overall space performance more than any other design decision—making it critical to plan before purchasing equipment.
- Ideal viewing distance is 1.5 to 2.5 times the screen width, and dedicated theater seating maintains uniform ear height (36–42 inches) to optimize surround sound calibration.
- Power recliners cost more and require 120V wiring in-wall, while manual recliners offer quality comfort at lower cost without electrical infrastructure needs.
- Two-row setups require back-row risers of 12–18 inches height to maintain clear sightlines, and proper spacing of 2–4 inches between seats prevents armrest conflicts.
- Budget-friendly strategies include mixing dedicated theater chairs in the front row with residential sectionals in back, building DIY risers from lumber, and shopping off-peak sales for 20–30% discounts.
- High-density foam (2.0 lb/ft³ minimum), steel frames, and performance fabrics outperform cheaper materials, while premium features like motorized headrests and massage functions rarely justify their added cost.
Why Your Seating Choice Defines Your Home Theater
Seating determines viewing angles, audio sweet spots, and how many people can actually use the space. A home theater with poorly positioned seats, too close, too far, or off-axis to the screen, wastes the investment in a projector, receiver, and speakers.
Sightlines matter more than resolution. A 4K projector on a 120-inch screen means nothing if viewers sit at extreme angles or crane their necks. The ideal viewing distance for most setups is 1.5 to 2.5 times the screen width, depending on resolution. For a 100-inch diagonal 16:9 screen (87 inches wide), that’s roughly 11 to 18 feet.
Audio imaging depends on consistent ear height. Surround sound systems are calibrated for specific listener positions. Mixing recliners, couches, and bean bags creates wildly different ear heights, which throws off speaker timing and tonality. Dedicated theater seating keeps heads at a uniform level, usually 36 to 42 inches from the floor when seated.
Capacity planning affects room design early. Deciding on two rows of four seats versus a single sectional influences subfloor work, riser height, electrical rough-in for power recliners, and HVAC duct placement. Change the seating plan mid-build, and you’re rerouting conduit or relocating outlets.
Types of Home Theater Seating to Consider
Recliners and Theater Chairs
Dedicated theater recliners are the default for serious setups. These range from manual recline models (pull a lever, push back) to power recliners with USB charging, lighted cupholders, and motorized headrests. Most are sold individually or in rows of two to four connected seats.
Dimensions: Typical width per seat is 22 to 26 inches: depth when reclined extends 60 to 72 inches. Always measure the reclined footprint, many DIYers order seats that physically can’t recline in their rooms.
Construction: Look for kiln-dried hardwood frames, high-density foam (2.0 lb/ft³ or higher), and top-grain or bonded leather (or performance fabric if kids and pets are in the picture). Cheaper seats use particleboard frames and low-density foam that bottoms out within a year.
Power vs. manual: Power recliners require 120V outlets at each seat. Run conduit in the wall or under a riser before drywall. Manual recliners cost less and don’t need wiring, but lack the fine-tuned positioning that power mechanisms offer.
Pros: Optimized sightlines, uniform seat height, cupholders, and storage. Cons: Higher cost per seat ($400–$2,000+ each), fixed layout, and bulkier footprint than residential furniture.
Sectionals and Couches
Residential sectionals offer flexibility and a more casual vibe. They work well in multi-purpose spaces (family room doubling as a theater) where rigid rows feel out of place. Modular sectionals let homeowners reconfigure as needed.
Sightline trade-offs: Standard couches sit lower (16 to 18 inches seat height) than theater chairs (19 to 21 inches), which can cause head-blocking in multi-row setups. Solve this with a riser platform for the back row, typically 12 to 18 inches high, built from 2×10 or 2×12 treated lumber or plywood over a stud frame.
Audio considerations: Deep sectionals encourage slouching or side-lying, which moves ears out of the calibrated listening zone. If using a sectional, position it so seated listeners’ ears align with the center channel speaker (usually mounted at screen center height).
Pros: Lower cost per linear foot, flexible arrangement, family-friendly. Cons: Inconsistent sightlines, less optimized for surround sound, no built-in features like cupholders or storage.
How to Plan Your Seating Layout for Optimal Viewing
Start with the screen, not the seats. Screen size and placement dictate where seating can go.
Calculate viewing distance first. For a 4K display, the Society of Motion Picture and Television Engineers (SMPTE) recommends a viewing angle of roughly 30 to 40 degrees. That translates to sitting about 1.2 to 1.5 times the screen width away for an immersive feel, or 1.5 to 2.5 times for a more relaxed experience. Measure from eyes to screen, not wall to wall.
Row spacing and risers: If adding a second row, the back row needs a clear view over the front row’s heads. A 12-inch riser (measured from finished floor to top of riser platform) is the minimum for most setups: 15 to 18 inches is better. Build risers from 2×10 or 2×12 joists on 16-inch centers, topped with ¾-inch plywood and finished flooring or carpet. Secure the frame to the subfloor with construction screws or Tapcons if anchoring to concrete.
Lateral spacing: Leave 2 to 4 inches between individual theater seats for armrest clearance. For sectionals, allow at least 36 inches of walking space behind the last row for access, 42 inches is more comfortable.
Center seats are prime real estate. The best audio imaging happens in the front row center, directly in line with the center channel speaker. If the room only fits one row, center it on the screen. For two rows, prioritize the front row’s center seats for critical listening: the back row will have slightly less precise audio but still benefits from the surround array.
Check local codes: Risers over a certain height (often 30 inches, but varies by jurisdiction) may require guardrails. If building a platform that doubles as storage or hides HVAC equipment, verify International Residential Code (IRC) Chapter 3 requirements for floor load capacity (typically 40 PSF for residential floors).
Key Features to Look for in Home Theater Seats
Recline mechanism quality: Cheap mechanisms use plastic gears and lightweight springs that fail under regular use. Look for steel frames and ball-bearing pivot points. Test the recline motion in person if possible, it should be smooth and lock firmly at each position.
Seat and back cushioning: High-density foam (2.0 lb/ft³ minimum) holds shape over time. Memory foam toppers add comfort but can retain heat. Gel-infused foam or ventilated designs help with airflow during long viewing sessions.
Upholstery durability: Top-grain leather looks premium but shows wear and requires conditioning. Bonded leather (leather scraps bonded to a polyurethane backing) costs less but peels after a few years. Performance fabrics (often polyester blends with stain treatments) stand up better to spills and pet claws.
Cupholders and storage: Lighted cupholders (LED, usually powered by AA batteries or USB) are standard on mid-range theater seats. Storage consoles between seats hold remotes, phone chargers, and snacks. Make sure consoles are removable or flip-up for cleaning.
Power and USB charging: Power recliners need accessible outlets. Some models include built-in USB ports (5V, 2.1A typical) in the armrests for charging devices. Verify the seat’s power draw (usually 1–2 amps per motor) doesn’t overload a shared circuit.
Adjustable headrests and lumbar support: Premium seats offer independent headrest and lumbar adjustments. This matters for mixed-height users or long movie marathons. Manual adjustments are simpler and more reliable than motorized versions.
Tray tables and swivel bases: Some theater chairs include fold-out tray tables or swivel mechanisms (useful for side conversation without turning the whole body). These add cost and complexity but improve usability in flexible spaces.
Budget-Friendly Seating Solutions That Don’t Sacrifice Comfort
Manual recliners over power: Eliminating motors and wiring saves $200–$400 per seat. Manual recliners from brands like Seatcraft or Octane still offer quality frames and upholstery without the electronics.
Mix seating types strategically: Use dedicated theater chairs in the front row (where sightlines and audio matter most) and a residential sectional or loveseat in the back row. This hybrid approach delivers performance where it counts and comfort where it’s needed, at a lower total cost.
Buy during off-peak sales: Theater seating goes on sale around Black Friday, New Year, and mid-summer. Expect 20–30% discounts on floor models or last year’s upholstery colors. Be ready to measure and buy quickly, popular configurations sell out.
DIY riser platforms: Building a riser from dimensional lumber costs $100–$300 in materials versus $500–$1,000+ for prefab risers. Use pressure-treated 2×10s for the frame, ¾-inch plywood for the deck, and carpet or laminate for the finished surface. Add LED strip lighting along the riser edge for safety and ambiance (low-voltage 12V strips run about $15–$30 for 16 feet).
Refurbish existing furniture: A sturdy reclining loveseat or sofa can be reupholstered and fitted with aftermarket cupholders (adhesive or clamp-on models, $15–$40 per pair). This works when the frame and mechanism are solid but the fabric is worn. Local upholstery shops charge $300–$800 depending on size and material.
Skip unnecessary features: Lighted cupholders, motorized headrests, and massage functions add cost without improving the viewing experience. Focus budget on frame quality, foam density, and proper dimensions first. Features can be added later or omitted entirely.
Consider open-box and returns: Online retailers and big-box stores often sell returned or slightly damaged theater seats at steep discounts. Inspect carefully for frame damage or motor issues, but cosmetic flaws (small scratches, mismatched thread) are usually acceptable trade-offs for 30–50% savings.
The best home theater seating balances viewing geometry, audio performance, and honest comfort within the room’s physical and financial constraints. Measure twice, account for recline clearance and riser height, and prioritize the features that actually improve the experience. Skip the gimmicks, respect the sightlines, and the room will perform as well as setups costing twice as much. For more ideas on maximizing home theater setups without very costly, explore layout strategies that integrate smart design with practical budgeting. Those interested in connected home automation can layer in smart lighting and motorized shades to complete the theater experience. DIYers seeking visual inspiration and contractor portfolios can browse design galleries to see real-world seating installations and finish details.