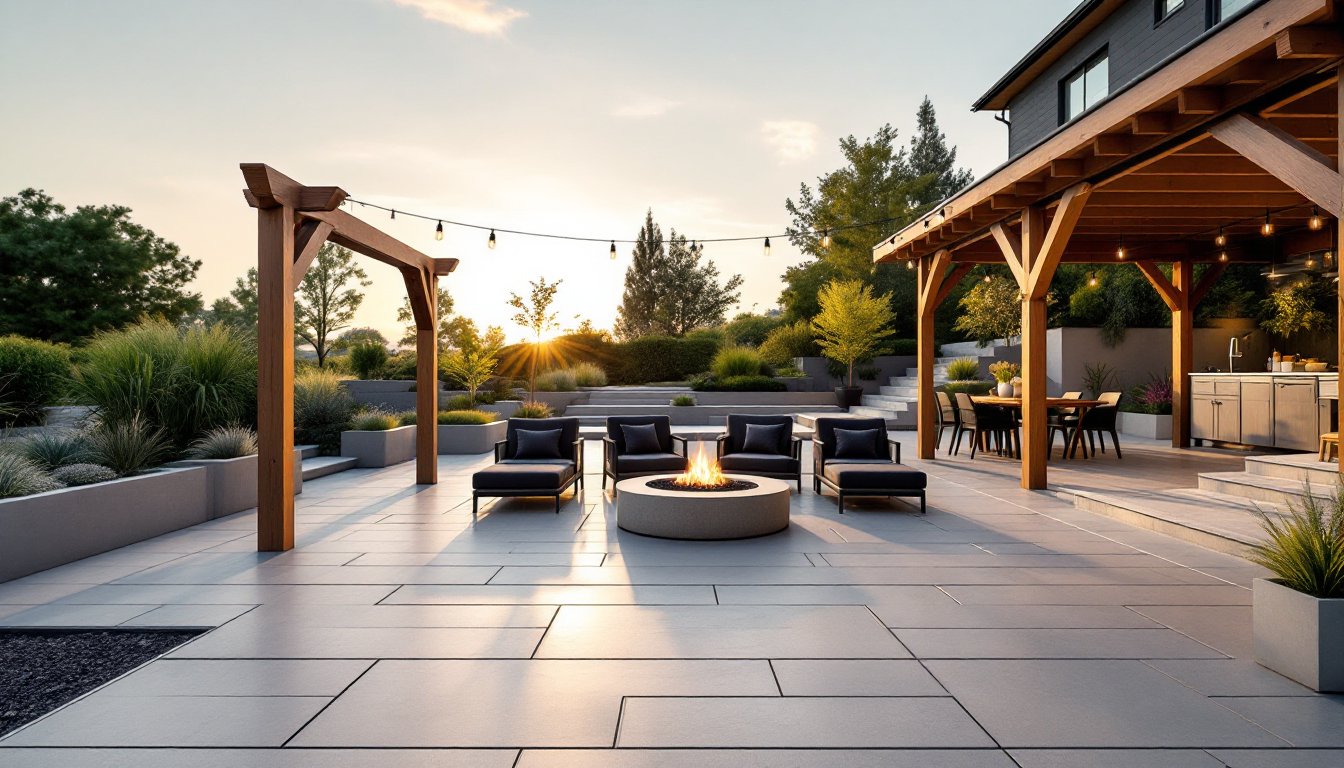
A well-designed patio doesn’t just extend your living space, it redefines how you use your yard. Whether you’re looking to create an entertainment hub, a quiet retreat, or a functional outdoor room, the right layout and materials make all the difference. In 2026, homeowners are blending clean aesthetics with practical features like built-in seating, weather protection, and layered lighting. This guide covers proven patio concepts, from minimalist concrete slabs to multi-level stone terraces, along with the materials, dimensions, and construction notes you need to plan smart and build once.
Table of Contents
ToggleKey Takeaways
- Backyard patios ideas range from minimalist concrete designs ($6–$12 per square foot) to multi-level terraced layouts that transform sloped yards into functional outdoor living zones.
- Budget-friendly patio options like pea gravel, concrete pavers, and reclaimed brick can create a complete DIY patio for $500–$1,500, making outdoor improvements accessible to every homeowner.
- Fire pit patios require careful planning around local codes, clearances of at least 10 feet from structures, and non-combustible surfaces to ensure safe year-round entertaining.
- Covered patios with pergolas, solid-roof extensions, or retractable awnings extend usability into different seasons while protecting furniture and outdoor appliances from weather damage.
- Weekend DIY projects like paver borders, string light posts, and stenciled concrete deliver high-impact patio upgrades in 1–2 days without professional installation costs.
- Proper drainage, frost-depth footings, ledger board flashing, and permit compliance are critical for structural patio elements like retaining walls and roof attachments to prevent long-term damage.
Modern Minimalist Patio Designs
Minimalist patios strip away clutter and focus on clean lines, neutral palettes, and high-quality materials. Think poured concrete with smooth trowel finishes, large-format pavers (24×24 inches or larger), and metal or composite edging.
Material Choices:
• Concrete slabs: Cost-effective at $6–$12 per square foot installed. Pour a 4-inch slab over 4 inches of compacted gravel for most residential applications. Residential concrete typically uses a 3,000–4,000 PSI mix.
• Porcelain pavers: Low-maintenance, fade-resistant, and available in stone or wood looks. Expect $15–$25 per square foot installed.
• Steel edging: Creates sharp borders and costs around $3–$5 per linear foot.
Keep furniture simple, powder-coated aluminum frames, teak benches, or molded resin seating in black, white, or gray. Add a single statement piece like a linear fire feature or a cantilevered umbrella. Avoid fussy planters: use geometric concrete containers with ornamental grasses or succulents in odd-numbered groups.
Lighting: Recessed LED strips along edges or under benches provide ambient glow without visual clutter. Install low-voltage (12V) systems for safety and easier DIY installation.
Tip: Pour concrete in sections no larger than 10×10 feet and include control joints every 8–10 feet to manage cracking as the slab cures.
Budget-Friendly Patio Ideas for Every Homeowner
You don’t need a four-figure budget to build a functional patio. Smart material choices and sweat equity can deliver a solid outdoor space for $500–$1,500, depending on size.
Affordable Material Options:
• Pea gravel: $30–$50 per cubic yard delivered. A 10×12-foot patio needs roughly 1.5 cubic yards at 2-inch depth. Install landscape fabric underneath to suppress weeds.
• Concrete pavers: Basic 12×12-inch pavers run $1–$3 each at home centers. A 120-square-foot patio uses about 120 pavers.
• Crushed stone or decomposed granite: Around $40–$60 per cubic yard. Compacts well and drains naturally.
• Reclaimed brick: Check salvage yards. Prices vary wildly but often beat new brick ($0.50–$2 per brick used vs. $0.80–$3 new).
DIY Steps for a Basic Paver Patio:
- Excavate 6–8 inches deep (4 inches base + 2 inches sand + paver thickness).
- Compact 4 inches of crushed stone base using a plate compactor (rent for $60–$80/day).
- Screed 1–2 inches of coarse sand level.
- Lay pavers in your chosen pattern, leaving 1/8-inch gaps.
- Sweep polymeric sand into joints and mist with water to lock pavers in place.
Safety Note: Wear work gloves and knee pads during installation. A plate compactor is loud, use ear protection.
Skip expensive outdoor furniture initially. Cinder blocks and 4×4 cedar beams make sturdy bench frames, and outdoor cushions from discount stores add comfort without very costly.
Cozy Fire Pit Patios for Year-Round Entertaining
A fire pit extends patio season into fall and early spring. But placement, materials, and local codes matter more than aesthetics.
Fire Pit Types:
• Wood-burning: Classic ambiance, but check local ordinances, many municipalities restrict open flames during dry seasons.
• Propane or natural gas: Cleaner, easier to control, and often code-compliant where wood isn’t. Requires a gas line or tank hookup.
• Prefab steel rings: $150–$400, easy install. Set on a non-combustible base like pavers or gravel, not wood decking.
• Custom stone or block: Costs $800–$2,000+ depending on size and masonry work. Use firebrick for the inner ring to handle high heat.
Clearances & Safety:
• Maintain at least 10 feet from structures, overhangs, and trees.
• Install the fire pit on a level, non-combustible surface. If on a paver patio, ensure pavers are rated for high heat exposure.
• Keep a fire extinguisher or garden hose within reach.
• Many jurisdictions require a permit for permanent, gas-fed installations. Check with your local building department.
Seating Layout:
Arrange seating in a semi-circle or full circle 3–4 feet from the pit edge. Built-in stone benches or retaining wall blocks with capstones double as seating and planters. Movable Adirondack chairs offer flexibility.
Tip: If building a custom stone fire pit, use a steel liner insert ($100–$250) to protect masonry from thermal stress and simplify ash cleanup.
Multi-Level and Tiered Patio Layouts
Sloped yards present challenges, but multi-level patios turn elevation change into design opportunity. Terracing also improves drainage and creates distinct zones for dining, lounging, and cooking.
Planning Considerations:
• Retaining walls: Required when grade change exceeds 12–18 inches. Walls over 4 feet tall often require engineering and permits due to soil load. Use concrete block, natural stone, or treated timber.
• Step risers: Keep risers between 4 and 7 inches and treads at least 11 inches deep per IRC guidelines (check local amendments).
• Drainage: Install French drains or perforated pipe behind retaining walls to prevent water buildup and wall failure.
Material Recommendations:
• Stacked stone or block systems: Interlocking systems like Allan Block or Versa-Lok simplify DIY installation and don’t require mortar for walls under 3–4 feet.
• Flagstone or irregular pavers: Complement natural slopes and give a more organic, less rigid look compared to grid-pattern pavers.
• Gravel between levels: A cost-effective way to fill transitional zones and improve drainage.
Design Tip:
Use the upper level for dining (keeps furniture away from runoff) and the lower level for a fire pit or lounge area. Built-in planters along retaining walls soften the hard edges and add vertical interest.
Tool Note: Rent a mini excavator ($200–$350/day) if you’re moving more than a few cubic yards of soil. Hand-digging a terraced patio is brutal work.
Permit Alert: Retaining walls over 4 feet, and sometimes over 3 feet, typically require permits and engineered plans. Always check before you dig.
Covered Patio Designs for Shade and Protection
A roof or pergola transforms a patio from seasonal to year-round. Covered structures also protect furniture, reduce UV exposure, and keep rain off the grill.
Structure Options:
• Pergolas: Provide partial shade. Use pressure-treated 2×8 or 2×10 rafters spaced 16–24 inches on center. Cedar or redwood offer natural rot resistance but cost more.
• Solid-roof extensions: Tie into existing house roofing for full weather protection. Requires ledger board attachment to house framing and flashing to prevent leaks. This is structural work, permits required in most jurisdictions.
• Freestanding pavilions: Metal or timber frame with a gable or hip roof. Easier to permit than attached structures in some areas.
• Retractable awnings: Motorized or manual, costs $500–$3,000 installed. No structural load on the house, but fabric degrades in 5–10 years.
Attachment & Code Notes:
When attaching a ledger board to the house for a covered patio, use ½-inch lag screws or structural screws into wall studs or rim joist, not just siding. Install metal flashing over the ledger to direct water away. Most codes require frost-depth footings for posts (typically 36–48 inches deep depending on climate).
Roofing Materials:
• Polycarbonate panels: Translucent, lightweight, and affordable ($2–$4 per square foot). Block UV but let light through.
• Metal roofing: Durable, spans long distances, costs $3–$7 per square foot in corrugated or standing-seam profiles.
• Asphalt shingles: Match your house roof. Requires solid decking (plywood or OSB), adding cost and weight.
For an outdoor kitchen patio, a solid roof protects appliances and keeps the cooking zone usable in light rain.
Safety Reminder: Working overhead requires eye protection and stable footing. Use scaffolding or a sturdy platform, not a ladder alone.
DIY Patio Projects You Can Tackle This Weekend
Not every patio upgrade requires a week off work. These projects deliver high impact in 1–2 days.
Quick Wins:
1. Gravel Patio Refresh
If you already have a gravel patio, top-dress with 1 inch of fresh pea gravel or crushed stone. Rake smooth and compact lightly. Cost: $100–$200 for a 10×12-foot area.
2. Paver Accent Border
Frame an existing concrete slab with a single row of brick pavers or cobblestones. Excavate a 4-inch trench around the perimeter, add 2 inches of sand, set pavers, and backfill. Adds definition and a finished look.
3. String Light Posts
Sink two 4×4 posts in concrete (use Quikrete fast-setting mix in 8-inch diameter holes, 24 inches deep). Let cure 24 hours, then string Edison bulb lights across. Total cost: $80–$150. Use a GFCI-protected outlet for power.
4. DIY Fire Pit
Buy a steel fire ring ($40–$100) and surround it with retaining wall block in a circle, dry-stacked (no mortar). Two or three courses high is plenty. You’ll need 30–40 blocks for a 36-inch interior diameter. Finish in an afternoon.
5. Stenciled Concrete
Clean an existing concrete patio, then use a large stencil and concrete stain or masonry paint to add a pattern (geometric, tile look, etc.). Seal with clear acrylic sealer for durability. This approach is featured in seasonal updates on sites like Better Homes & Gardens.
6. Built-In Planter Boxes
Use 2×6 or 2×8 cedar boards to build rectangular planters. Line with landscape fabric, fill with potting soil, and plant perennials or grasses. Anchor boxes to the patio edge with concrete screws if needed.
Safety Gear for Weekend Projects:
• Work gloves (handling stone, wood, or metal)
• Safety glasses (cutting, drilling, or mixing concrete)
• Dust mask (cutting pavers or mixing dry concrete)
• Hearing protection (power saws, compactors)
Conclusion
A thoughtfully planned patio adds usable square footage, increases property value, and gives homeowners a reason to spend more time outside. Whether the goal is a minimalist lounge, a covered dining area, or a durable paver surface that handles foot traffic for decades, success comes down to solid prep, the right materials, and realistic expectations about time and skill. For smaller projects, a weekend and basic tools are enough. For structural work, retaining walls, roof attachments, or gas lines, call in a pro or pull the permits. Either way, the result is an outdoor space built to last.